California Oakenwood

California Oakenwood Gallery

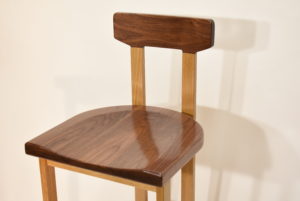
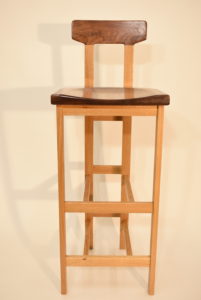
OK! Fine! In my last post I said I wouldn’t post Carol’s stools but they turned out so well, and the oak and walnut contrasts so beautifully, and Carol sent pictures of the stools placed in her home….so Imma gonna post those pictures anyway.

Carol and Bob were wonderful to work with. Patient, for sure, but the best part was they knew exactly what they wanted. No, ifs ands or buts…they knew, and it made the project ‘go’ very efficiently. And once you see their pictures I think you’ll agree that their taste is, well, impeccable.

PS: I don’t know the kitty’s name but he’s obviously an efficient photo bomber. For our purposes we’ll address him as Oakenwood, or Oakie for short…

California Oakenwood Gallery


Barstools, barstools, and more barstools; and other stuff

I won’t bore you with a lot of details but, since the Folding Table project, I’ve been busily making barstools.

Beth (see Walnut in Vermont) had originally ordered 4 stools of solid Walnut (frame, seat, and backs) but called back for 2 more.

Emily, from Manhattan, requested 2 barstools (38″ tall at the seat!). Walnut everything.

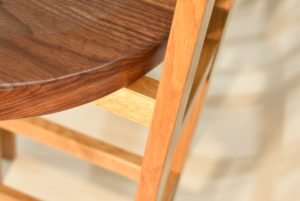
And Carol, from California, ordered 3 barstools of White Oak frames and Walnut seats and backs. I have to say that this is a beautiful, and robust, combination. I don’t have a gallery for these stools simply because they (the barstools) are on the site already in different species. But below are a couple of photos (sorry, can’t help myself).

Have a great summer and stay safe…..


Chestnut: One Tough Nut!

Will’s Folding Table

A client right here in South Carolina contacted me, through CustomMade, for a folding top table.  To be perfectly honest I didn’t fully understand what a folding top table was….I kept thinking ‘drop-leaf’….but Will finally showed me the way and off we go. The design of the table was easy as we’d found an online picture of the table he wanted. The choice of wood species was a bit more difficult but we settled on re-claimed Chestnut for lots of reasons (eco-friendly, color and grain patterns, and the charm of all those worm holes).

And a bench to match.

The unusual specification was that Will wanted the table to be 36″ (counter height) tall and, of course, the bench had to compatible with that height. Different.

I was definitely pleased with the outcome and I think Will was too. It was a fun project but definitely had some significant challenges. Check out the photos….

Walnut in Vermont

Walnut in Vermont Gallery

Beth from Vermont contacted me vis-a-vis my ever-popular bar stools, except she wanted four solid Walnut stools. So we settled on specifications and got to work. Turns out my local walnut store had an ample supply of some very high quality walnut (no kidding! no knots, almost no sapwood, very clean) so I stocked up and built ’em. I love to build these stools because there is a fine balance between machine work (table and miter saw, planer/jointer, etc.) and hand work (hand planes, chisels, and other shaping tools).  The last trick on this project was how to move them from Anderson, SC to Vermont, since Vermont is a bit outside of my delivery scope. Turns out there are very useful and safe delivery services that pick up and deliver up and down eastern US, and they do it quite cost effectively. Bottom line is that the stools turned out well and Beth says ‘they are works of art’. Aw, shucks…

You Win Some, You Lose Some

You Win Some? (link to photos)

So, having carved some additional seats from my last big project I decided to put a stool frame under one of them. This stool has a Birch seat and Mahogany  frame and is pretty much typical in most ways. With this stool, however, I got just a little bit lazy with the back….rather than rip veneer strips and glue them together in a form to create a laminated, curved back, I tried something different….as you can see in the photos. Some may like this look but, frankly, I don’t. Nor will I ever do this again unless someone specifically asks for it (why would they do such a thing?).  The back reminds me of something off an M1 Abrams tank which is as elegant as a crack in concrete!

All well, you win some, you lose some. This stool will prolly hang around in my shop for a while…

It’s May in October!


In April 2019 I was contacted by May, an Interior Designer based in Manhattan (that’d be Manhattan, New York City). She had been perusing CustomMade for barstools for a new Thai diner in NOLITA (just north of Little Italy)  and came across some I’d made for my daughter-in-law, Allie. Well, May needed 20 (yes, twenty) of these but did not want the frame…just the seats and backs. We’d have to come up with a way to connect them but I was sure there was an elegant but robust way of doing so. These seats would be mounted to a chrome, swiveling pedestal….and did I mention she wanted 20 of these?

So it all came to pass. I’d connect the backs via two chromed brackets mortised into the back and screwed underneath the seat with inserts and stainless steel machine screws. Of course I had to ‘farm out’ the brackets and boy did I learn a little bit about steel, bending steel (accurately),  and chroming! Especially chroming. Do not ever let anyone tell you that you can substitute chroming with “silver powder-coating”. It AIN’T the same. Anyway….

The idea was to make and finish 20 seats by 1 June and I did….I shipped on 24 May. Unfortunately, due to building renovation, licensing and permitting issues, as well as labor problems, the diner has yet to open but we’re hoping for November. Meanwhile May sent me these pictures and I’m so glad to have been a part of her project.

So, if you’re ever in Manhattan and are craving some Thai cuisine, I’d recommend “Thai Diner” located at the corner of Mott St and Kenmare St. I’m sure it’d be a fabulous experience!



Why, Heavens to Mergatroid! It’s Walnut!

Walnut Writing Desk

Finally, finally finished the Bow Front Walnut Writing Desk I’d started in January. Actually most of the work had been done prior to a vacation sprint in early March. All that was left was to finalize the drawer pull, complete the shaping and attaching of the top, and finishing. It is always amazing to me how applying a finish will ‘pop’ the grain, especially on walnut. This piece has 6 coats of hand applied oil-urethane combo and will not need refinishing for a very, very long time. And, no stain. Let the wood sing! That’s what I always say….:)

I’d seen this design, in different forms, primarily in Fine Woodworking magazine. They actually have a set of plans for a desk similar to this and, in an issue from 2018, posted a picture of a beautiful bow front desk built by a student at a woodworking school out west. I couldn’t take my eyes off it nor could I quit thinking about it so I built a similar desk. Admittedly, this one is simplified from the other designs but, in fact, that’s one of the things I love about this…simple, elegant design. Anyway, go to the gallery and take a look…please send any comments through the Contact page..

Think I’ll take a couple of summer months off…..refresh and recreate. And do honey-do’s. See you in the fall.

Wait! Hold the phone, Dories’ on!

Per my last posting (20 Feb 2019) I was working on a walnut writing desk. In fact,  just as I was finishing the ‘building’ part ( as opposed to the ‘finishing’ part) I was invited to participate in a ‘Florida Adventure’. So, my friend and I headed south on 28 Feb (my birthday) and went to Amelia Island, Jacksonville, Ormon Beach, Daytona, then across the state to Ocala National Park, and on to Tampa. From there we went to Crystal River and spent a few days enjoying the Manatee, good food, and mixed in a little business. While in Crystal River Dorie and I connected through CustomMade and decided to build her a new ladder-back bookcase for her new Study. While at it she had a ‘store bought’ desk dropped shipped to me to assemble and finish the same as her new bookcase. Take a look at the images in the gallery….I was happy with the result, she was happy, her husband was happy, we were all happy!

Still Goin’

After Kathy’s table in late fall (2018) I decided to take a break from the shop for the holidays. Although I did a few projects to improve efficiency in the shop I really have had no significant builds. I am now, however, working on a writing desk. I saw this piece in a recent “Fine Woodworking” issue and couldn’t take my eyes off of it….so I’ve decided to build it (at least my version of it). So far, so good…the legs are shaped, the aprons attached, the single drawer face has been shaped (bowed) and I’ve just finished the dovetails for the drawer. Once I have the drawer finished and ‘tuned in’ I’ll turn to the top. Hopefully I’ll be done in a couple of weeks and, to be sure, I’ll have some pics of the finished product on this website. Until then thanks for checking in. Let’s make sawdust!

Kathy’s Sofa Table

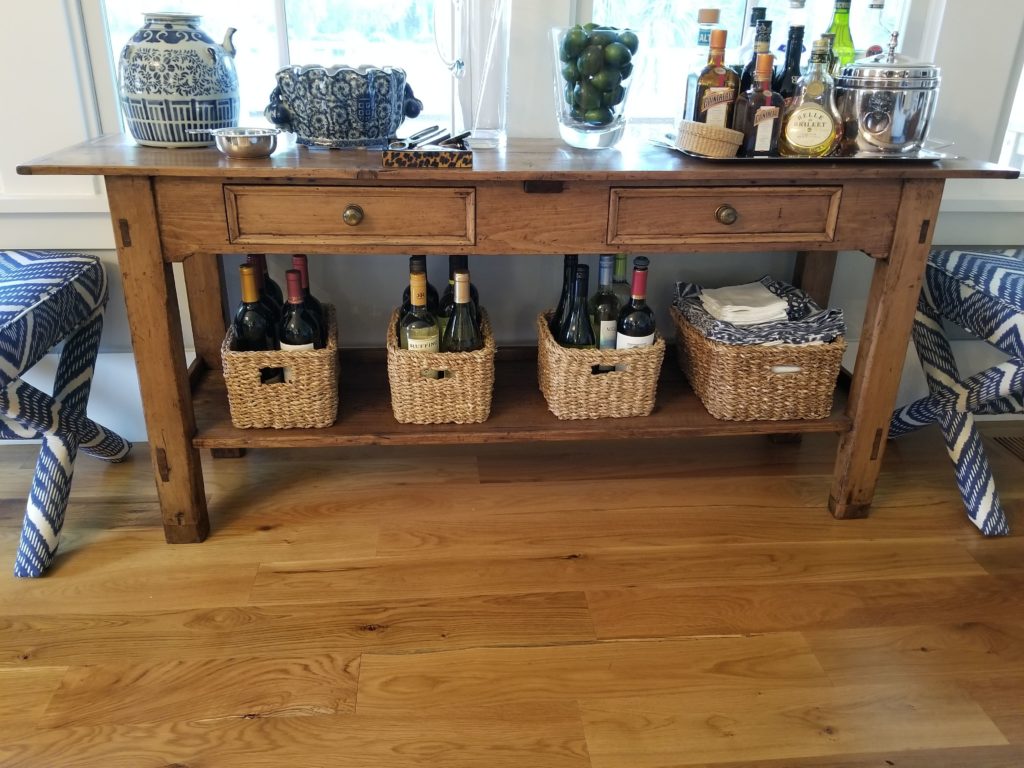
Kathy wanted a replica of an antique Irish Pine Sofa Table. After some discussion (emails, texts, and photographs) on the particulars and specifications of the table we set about a build. Kathy lives  approximately 4 hours from my location so an in-person visit to measure the table wasn’t easily achieved….. so we set about specifying and making measurements and communicating all of the above by email. Remarkably this method worked although Kathy probably took the brunt of the task. The only change from the original piece was overall height and one drawer instead of two. I’ve posted a picture of her original piece for comparison, below. The re-creation is in the Gallery.

I have to say that this was not only a fun build but very satisfying to me as a craftsman. Mortise and tenon, breadboard ends, rustic nature, and some creative fun with the aprons made it a joy to build.

Kathy’s antique Sofa Table